Back to Basics: Cross Country Skiing 101

Cross Country Skiing is, on the whole, not that complicated. Yes, you can get into the technical weeds when you’re talking high performance racing, and the intricacies of gear and techniques involved in that world; and on the surface, there do seem to be endless equipment options and approaches available to skiers. But, once you get past the long list of ways to ski, you’ll find that it’s incredibly straightforward to start skiing.
So what do you need to know to start skiing?
When you’re headed to a Nordic center for one of your first outings, it’s helpful to have decided what type of skiing you want to do. Broadly speaking, there are two options: skate skiing or classic skiing.
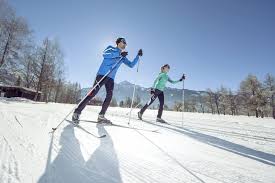
Classic skiing is the original, stereotypical form of cross country skiing. It involves two long, skinny skis with some sort of grippy surface on their base—either a sticky wax or a built-in fish scale pattern; the skier strides each ski forwards in a walking motion, using the grip on the ski to push forward into the next step. This simplicity is the beauty of classic skiing: though you can always improve your technique, even the most rudimentary walking-on-skis approach will allow you to travel across the groomed or ungroomed snow.

Skate skiing is a different story.
The technique came about only in the last half century, the discovery of racers who wanted to boost their skiing speed—sort of how punk rock sped off and departed from the tame rock and roll of the sixties, keeping the basic form while turning the whole sound up to eleven. Skating, as the name implies, uses essentially an ice-skating motion. Skiers press slightly shorter skis side to side, pushing off one ski that’s angled to dig into the track, while the other leading ski glides ahead to begin the next stride. This multi-step technique takes some getting used to; while skate skiing is an absolute pleasure once you get the hang of it, it is far easier to get your “ski legs” on classic skis before advancing to skate. Plus, if you’re an adventurous type, classic skiing is far better suited to off-trail exploration and ungroomed snow than skate skiing is and tends to be less condition-dependent.
Now that’s the confusing bits of Nordic covered… Or, actually, wait! There’s one more: “cross country skiing” and “Nordic skiing” have come to be used synonymously. They both refer to both skate and classic skiing, and whatever you say, ski folks will know what you’re talking about.
OK, now you are set to plan your first Nordic outing. Just be sure to select a Nordic Center with plenty of flat terrain, rental equipment available and ski instructors for hire, if you so desire. Also, as you pack up the car to any wintery ski adventure, don’t forget these key apparel tips:
- Wear multiple, thin, easy-to-shed layers; avoid cotton materials in your layering!
- The lighter the ski pants the better: chunky, alpine resort style ski pants tend to be to warm and cumbersome for cross country skiing. A better option would be long underwear with a water resistant running pant, or, better yet, dedicated Nordic pants.
- Don’t neglect your noggin. While the urban myth that I used to hear at ski practice, that you lose 80% of your body heat out your head, has been disproven, it is important to keep your head and ears warm. Wear a wicking, non-cotton hat or headband to keep the chill away and the sweat at bay.
- Ditto for gloves. Find the thinnest gloves you have that still keep your hands warm. You’ll find that big bulky alpine gloves just get in the way of all the pole gripping cross country skiing requires.


Getting on the snow
Okay. You’re at the Nordic center, trying on the rental equipment that will carry you across snowy fields and forest deep and wild—or the local golf course. Find boots that are snug around the heel (i.e. your heel doesn’t come up when you walk or go on tippy-toes) and have enough room in the toe region to not cramp you up. The pros at the Nordic shop should be able to help with this.
For skis, it is easiest to ask for wax-less classic skis: the ones with fish scale shaped grippers already embedded in the ski’s plastic base. With these nifty sticks, you can start striding right out the door, no wax or ski prep required.
Now, we’re out on the trail. Attaching the boots to the skis for the first time can be a bit of a puzzle: usually the ski binding has a lever or button that needs to be pulled or depressed, then the toe of the boot can be clicked into its slot, and finally the lever or button can be re-closed or un-pressed. Don’t be afraid to ask for help from a Nordic center employee or friendly passerby if you need.

Start by locating a flat area to practice your technique. Using your poles as support, get the feel of just walking around on the skis. Every few steps try to introduce a slide into the mix: try to press the grip on one ski into the snow, and use that traction to push off and transfer your weight onto the other ski. This is a stride.
Once you have restored a sense of balance, try losing the poles. Focus on the striding, and on the weight transfer from ski to ski, and side to side: this is where your power will come from.
We could continue to go through every step of the classic skiing process, but it is far more enjoyable to experience than to read about. So seek out a Nordic center near you, or in a spot you’ve always wanted to visit. Do a bit of research as to their rental fees and ski school availability; pack accordingly, and hit the trails. Nordic is safe, fun, and a great way to enjoy the winter months. You have nothing to lose by trying a bit of classic skiing the next chance you get, and a lifetime of adventure and peaceful exercise to gain.
Happy trails!


